Unwanted blank pages in Microsoft Word usually appear when hidden formatting elements such as Page Breaks or Section Breaks force content onto a new page. Because Word does not include a direct Delete Page option, the solution is to locate and remove the formatting element that created the page.
To delete a blank page in Word, first click the blank page and press Backspace or Delete. If the page remains, it is likely caused by a hidden break. Use the methods below to locate and remove it.
In this tutorial, you will learn how to delete a blank page in Word by identifying the break type and removing it, plus a fallback method when deletion fails.
- Using break deletion for Page Break or Section Break
- Using Go To when the Section Break cannot be deleted normally
Locating a Blank Page and Enabling Formatting Marks
You can identify the cause of a blank page by locating it in the Navigation Pane, then enabling formatting marks to reveal hidden Page Breaks or Section Breaks.
Steps:
Click the View tab.
In the Show group, check Navigation Pane.
In the Navigation Pane, click the Pages tab.
Identify the blank page from the thumbnails and click it.
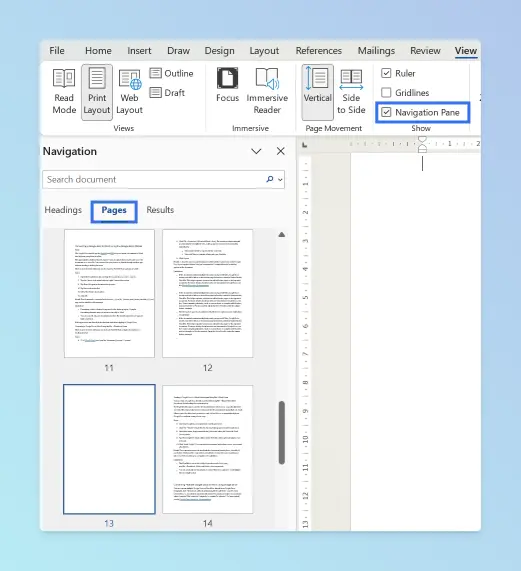
Press Ctrl + Shift + 8 (Windows) or Cmd + Shift + 8 (Mac) to show paragraph marks (¶), Page Breaks, and Section Breaks.

Result: Hidden breaks become visible, revealing the break type.
Check the blank page and the end of the previous page. The Page Break or Section Break (Next Page) marker appears either at the top of the blank page or at the bottom of the preceding page. Follow the steps below.
If you see a different break type (e.g. Column Break), try deleting it the same way.
Deleting a Blank Page in Word
You can remove a blank page by locating the Page Break or Section Break, clicking before it, and pressing Delete. The steps are the same for both break types.
For more blank page removal options, see the Microsoft Word support documentation.
Steps:
With formatting marks enabled, find Page Break or Section Break (Next Page) on the blank page or at the end of the previous page.
Click immediately before the break to place your cursor there.
Press Delete or Backspace.

Result: The blank page is removed. For Page Break, layout stays unchanged. For Section Break, adjacent sections merge into one.
Limitations (Section Break only): Removing a Section Break may affect headers and footers, margins, page orientation, and column layouts. Review the document after removal.
Deleting a Blank Page Using the Go To Command
You can force Word to select and remove a stubborn blank page using the Go To dialog. Click the blank page first so your cursor is on it, then follow these steps.
When to use: The Section Break cannot be deleted normally and the blank page persists.
Steps:
Press Ctrl + G (Windows) or Cmd + G (Mac) to open the Go To dialog. Click the Go To tab if it opens on Find.
In the Enter page number box, type
\page(a backslash followed by the word page).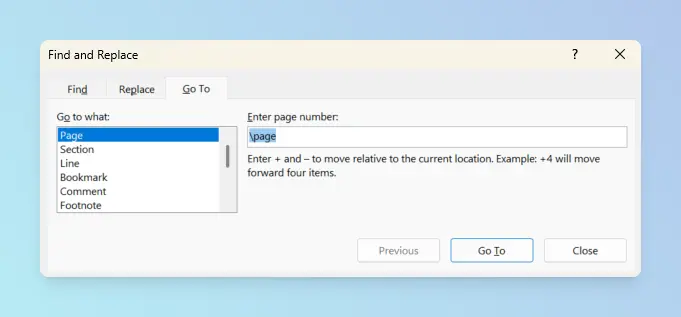
Click Go To.
Click Close to return to the document.
Press Backspace or Delete to remove the page.
Result: Word selects the entire blank page so it can be deleted with a single keypress.
Conclusion
You can remove unwanted blank pages in Word by enabling formatting marks to identify the cause, then deleting either the Page Break (layout unchanged) or the Section Break when necessary. Use the Go To command only when the break cannot be deleted normally.
After removal, you may need to adjust related layout settings:
- To change page orientation for a wide image or table, see how to make a page landscape in Word.
- To combine multiple Word documents into one file, see how to merge multiple Word documents into one.