When you insert an image in Word, it takes up a full line by itself, and any text appears either above or below it, never beside it. (Word calls this Inline with Text.) Changing the layout lets you place a photo on the left with a caption on the right, or a diagram beside its description, which is useful for tutorials, reports, and any document where a visual needs adjacent context.
In this tutorial, you will learn how to put an image and text side by side in Microsoft Word using 4 different methods, along with guidance on when to use each one.
Placing an Image and Text Side by Side in Word Using Wrap Text or Position Tools
You can place an image and text side by side in Word by changing the wrap setting from Inline with Text to Square.
Wrap settings control how text flows around an image. The two approaches below apply a wrap style and let you position the image beside the paragraph. For a full reference, see Wrap text around a picture in Word on Microsoft Support.
- Placing an Image and Text Side by Side Using Wrap Text — apply wrap, then drag the image beside the paragraph
- Placing an Image and Text Side by Side Using Position Tools — one-click preset from the Picture Format tab
Placing an Image and Text Side by Side Using Wrap Text
This approach gives you full drag-and-drop control over where the image sits beside the paragraph.
When to use: Quick formatting when the layout need not stay fixed during edits.
Steps:
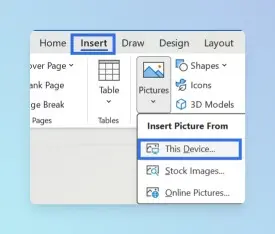
Go to the Insert tab and click Pictures to insert the image.(Browse the image from your computer)
Click the image to select it.
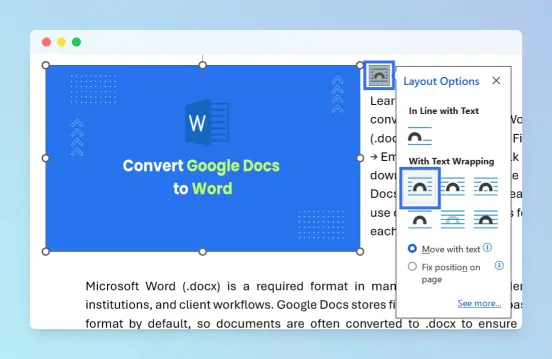
Click the Layout Options icon (upper-right corner of the image) to open the wrap settings panel.
Under With Text Wrapping, select a wrap style. (Hover over each option to see its name if it appears as an icon.)
- Square - wraps text in a rectangular boundary around the image; use for most images
- Tight - wraps text along the visible edge of the image; use for irregularly shaped images
- Through - similar to Tight but allows text to fill transparent areas; use for PNG images with transparent backgrounds
Optionally resize the image by dragging a corner handle (preserves proportions) or a side handle (stretches).
Click and drag the image to the left or right side of the paragraph.
Result: The image floats beside the paragraph with text wrapping around it. Text flows along the image edge instead of stacking above or below.
Common mistake: Dragging the image without first changing the wrap style from Inline with Text to Square has no effect. The image will not float until the wrap setting is updated.
Troubleshooting:
- Image stays stacked after dragging: confirm wrap is set to Square, not Inline with Text.
- Image moves to a different page after editing: this is expected; Word anchors it to the paragraph it was inserted near.
Limitations:
- Layout may shift when surrounding text is edited. Use a Table for a stable layout.
- Works in Word Online with limited positioning controls; advanced wrap adjustments require the desktop app.
Placing an Image and Text Side by Side Using Position Tools
This approach applies a wrap style and moves the image to a fixed corner position in one step, without any dragging.
When to use: Preset top-left or top-right placement without manual dragging.
Steps:
Go to the Insert tab and click Pictures to insert the image.(Browse the image from your computer)
Click the image to select it.
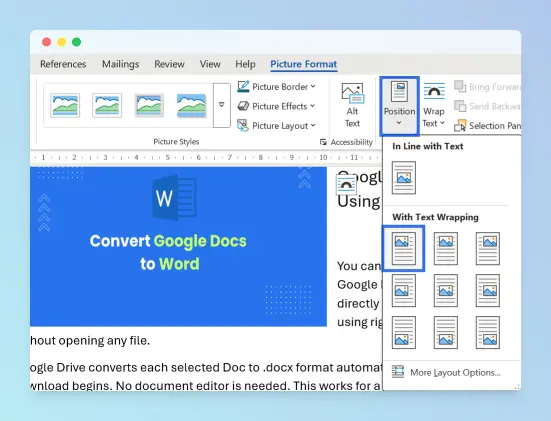
Go to the Picture Format tab and click Position in the Arrange group.
Select a preset, such as Top Left with Square Text Wrapping or Top Right with Square Text Wrapping. Word moves the image and applies wrap automatically. (Hover over each option to see its name if it appears as an icon.)
To adjust the gap between image and text, click the Layout Options icon beside the image, select More Layout Options, and adjust Distance from text under the Text Wrapping tab (Top, Bottom, Left, Right).
Result: The image moves to the preset position and text wraps around it automatically.
Troubleshooting:
- Picture Format tab not visible: click the image to select it.
- Unexpected position: use the Wrap Text approach above for full drag-and-drop control.
Limitations:
- Preset positions are limited; fine-grained control requires Wrap Text.
- Layout may shift when text is edited. Works in Word Online with limited positioning controls.
Placing an Image and Text Side by Side in Word Using Columns
You can place an image and text in parallel columns using the Columns setting and a Column break.
Columns divide a page section into vertical lanes that flow top to bottom, then continue at the top of the next column, similar to a newsletter. This approach requires two section breaks and one column break in a specific order to isolate the two-column area from the rest of the document. For more on column layout, see Create newsletter columns on Microsoft Support.
When to use: Newsletter or full-page layouts where text flows from one column to the next.
Note: Read each step in order. Refer to Troubleshooting if the layout spreads beyond the intended area.
Steps:
Place the cursor where the two-column layout should begin.
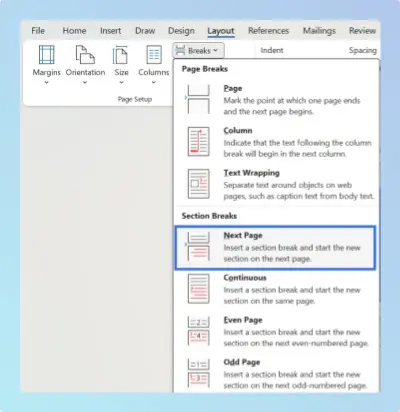
Go to the Layout tab and open the Breaks menu. Under Section Breaks, select Next Page.
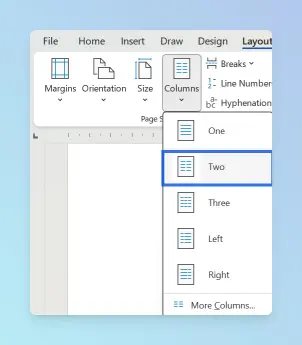
Place the cursor inside the new section. Go to the Layout tab and click Columns. Select Two.
Go to the Insert tab and click Pictures to insert the image (Browse the image from your computer). The image appears in the left column.
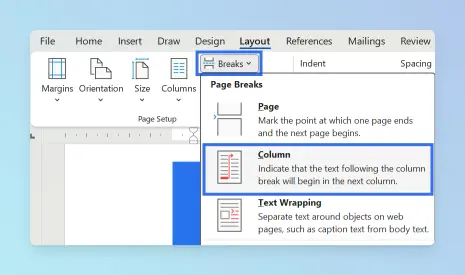
Go to the Layout tab, open the Breaks menu, and under Page Breaks, select Column. The cursor moves to the top of the right column.
Type or paste the text in the right column.
Place the cursor after the content in the right column. Go to the Layout tab, open the Breaks menu, and under Section Breaks, select Next Page. Content below returns to single-column layout.
To adjust column widths, go to the Layout tab, click Columns, and select More Columns. Enter custom widths and click OK.
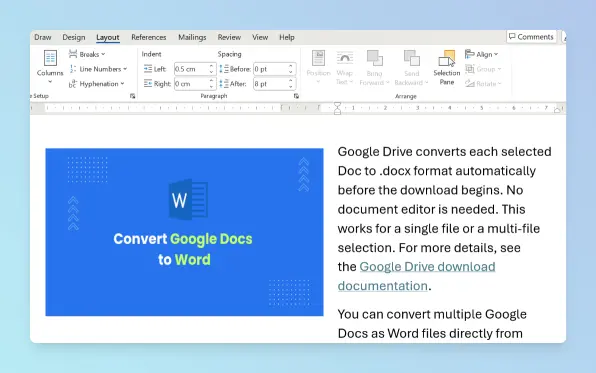
Result: The image appears in the left column and the text in the right. Content after the closing section break returns to a single-column layout.
Troubleshooting:
- Columns affect entire page: confirm the Next Page section break was added in step 2 before applying columns.
- Image in wrong column: delete the column break, re-insert the image in the left column, then re-add the break.
- Rest of document in two columns: confirm the closing Next Page break in step 7.
Limitations:
- Breaks require precise placement.
- Word Online supports basic columns; column break insertion may be limited. Use the desktop app for full control.
For a layout that stays fixed when you edit surrounding text, see the Table method below.
Placing an Image and Text Side by Side in Word Using a Table
You can create a stable side-by-side layout in Word by inserting a 1-row, 2-column table and placing the image and text in separate cells.
Unlike floating images, content inside table cells stays anchored and does not shift when surrounding paragraphs are edited. This makes tables the right choice for documentation and reports where layout consistency matters. For the official guide, see Insert a table on Microsoft Support.
When to use: Layout must remain fixed regardless of edits to surrounding content.
Steps:
Place the cursor where the side-by-side layout should begin.
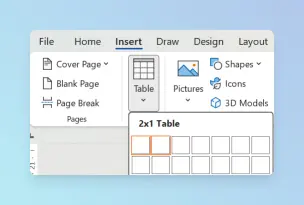
Go to the Insert tab and click Table. Hover over the grid to select 1 row, 2 columns and click to insert.
Click inside the left cell. Go to the Insert tab and click Pictures to insert the image.(Browse the image from your computer)
Resize the image by dragging a corner handle (preserves proportions; a side handle stretches).
Click inside the right cell and type or paste the text.
Adjust column widths by dragging the vertical border of the table between the two cells.
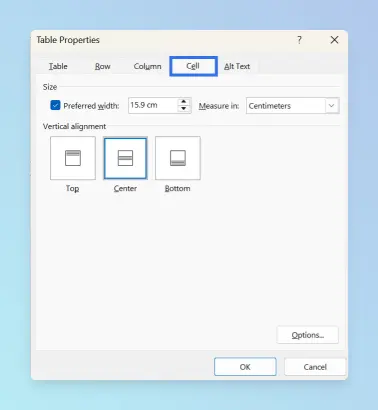
To set vertical alignment: right-click any cell, select Table Properties, go to the Cell tab, and choose Top, Center, or Bottom under Vertical alignment.
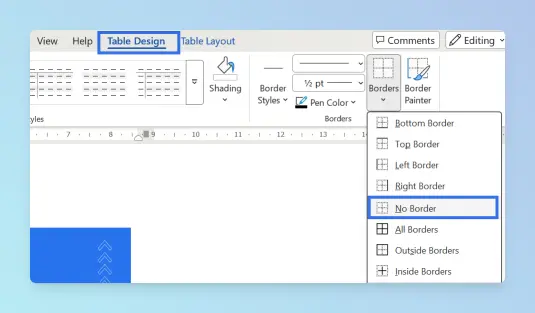
To remove borders: select the entire table, go to the Table Design tab, open the Borders dropdown, and select No Border.
Result: The image and text appear side by side in a fixed layout. With borders removed, the table structure is visually invisible. The layout does not shift when you add or remove text elsewhere in the document.

Troubleshooting:
- Borders remain visible: confirm the entire table is selected (Ctrl+A twice on Windows, Cmd+A twice on Mac), then reapply No Border.
- Image too large: drag a corner handle, not the column border.
Limitations:
- Column widths must be adjusted manually.
- Fully supported in Word Online.
For a freeform layout with callouts positioned independently of paragraph flow, see the Text Boxes or Shapes method below.
Placing an Image and Text Side by Side in Word Using Text Boxes or Shapes
You can place an image and text side by side in Word using a floating text box or shape.
Text boxes and shapes sit alongside the image without interacting with paragraph flow; both produce a similar visual result. You can add colors and styles to either using Shape Fill and Shape Outline, or apply No Outline for a borderless look. For the official guide, see Add, copy, or remove a text box on Microsoft Support.
- Placing an Image and Text Side by Side Using a Text Box - borderless container for plain layouts
- Placing an Image and Text Side by Side Using a Shape - fill, border, or custom form for callouts
Placing an Image and Text Side by Side Using a Text Box
A text box floats independently of paragraph flow, so you can position it freely beside the image without affecting surrounding text.
When to use: Clean, borderless floating container beside the image.
Steps:
Go to the Insert tab and click Pictures to insert the image.(Browse the image from your computer)
Click the image to select it.
Click the Layout Options icon (upper-right corner of the image) to open the wrap settings panel. Select Square or In Front of Text to position the text box beside the image.
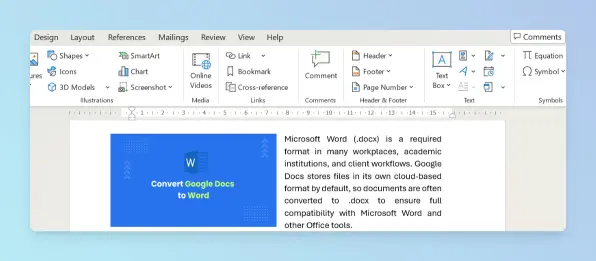
Go to the Insert tab, click Text Box, and select Draw Text Box. Click and drag to draw the box beside the image.
Click inside the box and type or paste the text.
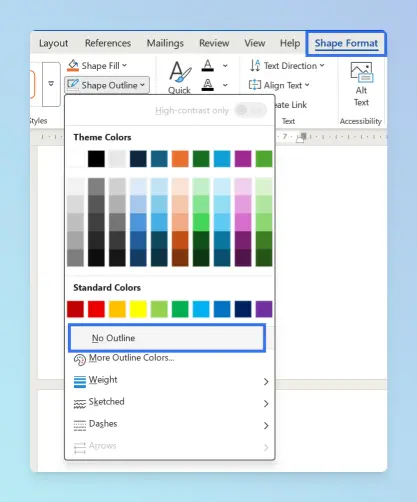
To remove the border, select the box, go to the Shape Format tab, click Shape Outline, and select No Outline. Optionally apply Shape Fill or a custom Shape Outline for colors and styles.
Result: A borderless floating text container sits beside the image. Both elements are independent and can be moved or resized.
Placing an Image and Text Side by Side Using a Shape
A shape works the same way as a text box but supports background fill, visible borders, and non-rectangular forms, making it suitable for styled callouts.
When to use: Fill color, visible border, or non-rectangular form for callouts.
Steps:
Go to the Insert tab and click Pictures to insert the image.(Browse the image from your computer)
Click the image to select it.
Click the Layout Options icon (upper-right corner of the image) to open the wrap settings panel. Select Square or In Front of Text to position the text box beside the image.
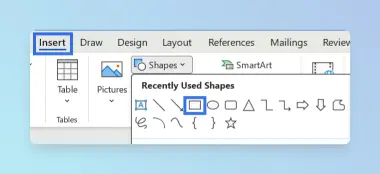
Go to the Insert tab, click Shapes, and select a shape (e.g. Rectangle). Click and drag to draw the shape beside the image.
Right-click the shape and select Add Text. Type or paste the text.
Go to the Shape Format tab. Use Shape Fill to set a background color and Shape Outline to set a border or select No Outline to remove it. (refer step 6 in Placing an Image and Text Side by Side Using a Text Box)
Result: A styled shape with text appears beside the image. Fill, border, and dimensions are all adjustable.
Grouping tip: Hold Ctrl (Windows) or Cmd (Mac), click both objects, right-click, and select Group → Group. To ungroup: right-click the group, then select Group → Ungroup.
Troubleshooting:
- Box or shape appears behind the image: right-click the box or shape, select Wrap Text, and choose In Front of Text.
- Find & Replace does not locate text in boxes or shapes: move the content to a table cell instead.
Limitations:
- Find & Replace and the Navigation Pane may not detect text inside boxes or shapes.
- Layout may shift when the document changes.
- Best used in the desktop app; Word Online has limited support.
Comparing Methods for Placing Images and Text Side by Side in Word
The main difference between these methods is layout stability when the document is edited. Floating objects can shift; tables and columns keep the layout anchored. The table below summarizes capabilities.
| Feature | Wrap Text / Position Tools | Columns | Table | Text Boxes / Shapes |
|---|---|---|---|---|
| Maintains fixed position during text edits | ❌ No | ✅ Yes | ✅ Yes | ❌ No |
| Keeps image and text in separate containers | ❌ No | ❌ No | ✅ Yes | ⚠️ Yes (floating objects) |
| Supports freeform floating placement | ✅ Yes | ❌ No | ❌ No | ✅ Yes |
| Supports multiple wrap styles (Square, Tight, Through) | ✅ Yes | ❌ No | ❌ No | ❌ No |
| Supports irregularly shaped images | ✅ Yes | ❌ No | ❌ No | ❌ No |
| Supports cell-level vertical alignment | ❌ No | ❌ No | ✅ Yes | ❌ No |
| Removable borders for a clean layout | ❌ No | ❌ No | ✅ Yes | ✅ Yes |
| Supports custom styling (fill, border) | ❌ No | ❌ No | ✅ Yes | ✅ Yes |
| Supports full-page parallel layout | ❌ No | ✅ Yes | ❌ No | ❌ No |
| Supported in Word Online | ✅ Limited | ✅ Limited | ✅ Yes | ⚠️ Limited |
Choosing the Right Method for Your Document
- If you are working on a document you will edit often, use a Table, it keeps the layout fixed regardless of text changes.
- For a quick one-off placement where exact position matters, use Wrap Text.
The right method depends on layout stability and how often you will edit the document.
| Method | Best For |
|---|---|
| Wrap Text | Quick floating layout when exact positioning is not critical |
| Position Tools | One-click preset placement without manual dragging |
| Columns | Full-page parallel sections in newsletters or magazine layouts |
| Table | Stable layout in tutorials, reports, and documentation |
| Text Boxes / Shapes | Freeform design layouts, callouts, and styled containers |
Once the layout is in place, you may need to adjust related settings or combine it with other documents:
- To change page orientation for a landscape image within a portrait document, see how to make a page landscape in Word.
- To combine multiple Word documents into one file after building the layout, see how to merge multiple Word documents into one.
Once you have finalized the visual layout of your document, you may need to adjust the orientation of complex pages or prepare the file for collaborative cloud editing:
- To rotate specific pages containing wide diagrams, see how to make a page landscape in Word.
- To move your formatted document to the cloud for real-time collaboration, see how to convert Word to Google Docs.
Conclusion
You can put an image and text side by side in Word using Wrap Text, Table, Columns, or Text Boxes and Shapes, each suited to a different level of layout stability and design control.
Because Word defaults to Inline with Text, images stack above or below paragraphs until you change the layout. Wrap Text and Position Tools are fastest for one-off formatting; Tables and Columns keep the layout anchored for tutorials, reports, and newsletters; Text Boxes and Shapes suit freeform designs with callouts. Use the comparison table above to choose the right method for your document.