
A fillable form in Word has fields people can type in, tick or pick from, while the questions and layout stay fixed. You build it with content controls on the Developer tab, then lock everything else.
- Turn on the Developer tab
- Add text fields
- Add checkboxes, drop-downs and combo boxes
- Add a date picker or picture field
- Change the placeholder hints
- Lock the form
- Share the form without breaking it
Planning the form first
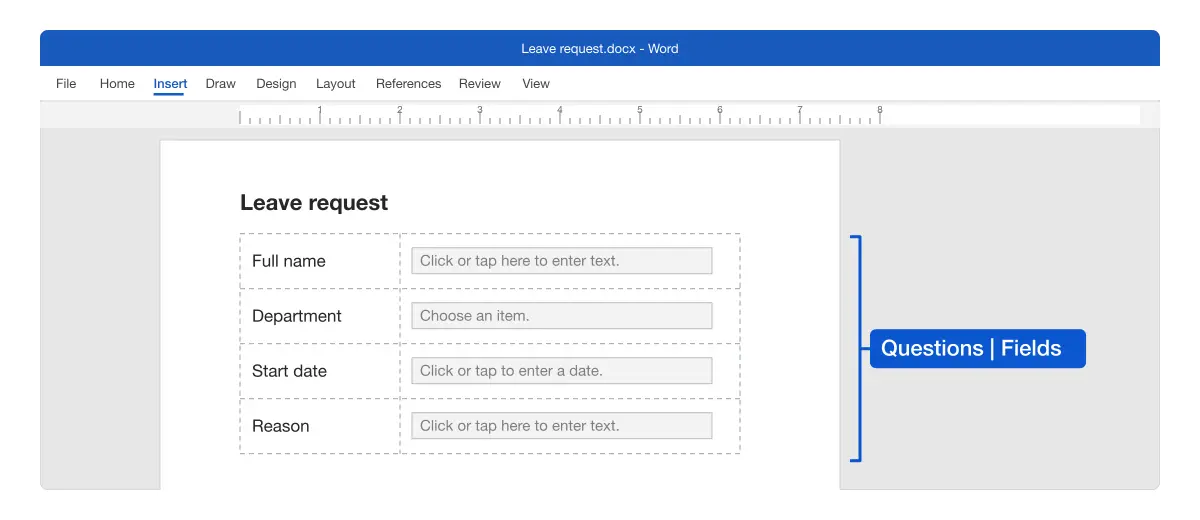
Type the form’s questions and labels as normal text before you add any fields. A table keeps labels and fields aligned: put the questions in the left column and the fields in the right.
Tip: The video’s practice form is a good starting point. Download the practice form to follow along, or open the completed form to see the result.
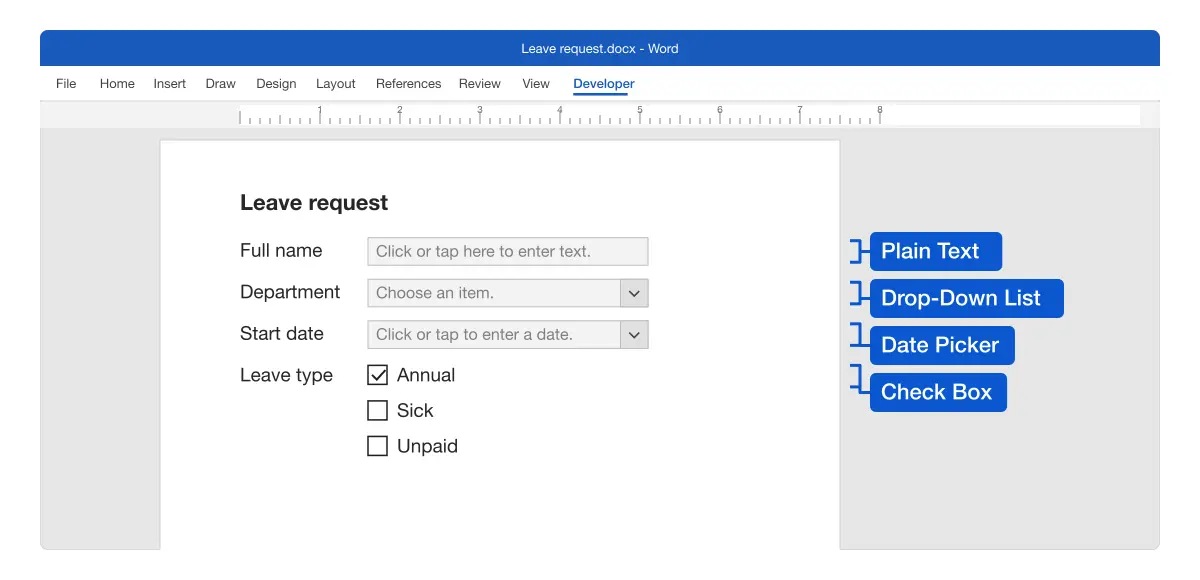
Pick the right field for each answer:
| Answer type | Content control | Example |
|---|---|---|
| Short typed answer | Plain Text | Name, phone number |
| Long or formatted answer | Rich Text | Comments, a cover note |
| Yes or no | Check Box | ”I agree to the terms” |
| One choice from a fixed list | Drop-Down List | Department, size |
| A choice or a custom answer | Combo Box | ”How did you hear about us?” |
| A date | Date Picker | Start date, date of birth |
| An image | Picture | Photo, signature image |
Turning on the Developer tab
Use this once. Word hides the form tools until you turn the tab on.
- Go to File > Options > Customize Ribbon.
- Under Main Tabs, tick Developer.
- Click OK.
Result: The Developer tab appears on the ribbon. Form fields live in its Controls group.
On a Mac, go to Word > Preferences > Ribbon & Toolbar and tick Developer.
Adding text fields
Use this for names, addresses and any typed answer.
- Click where the answer should go, for example the empty cell next to “Name”.
- Go to Developer > Controls.
- Click Plain Text Content Control (the first Aa icon).
Result: A box with “Click or tap here to enter text.” appears. People click it and type.
Use Rich Text Content Control instead when people may need bold text, several paragraphs or a pasted image, per Microsoft’s forms guide.
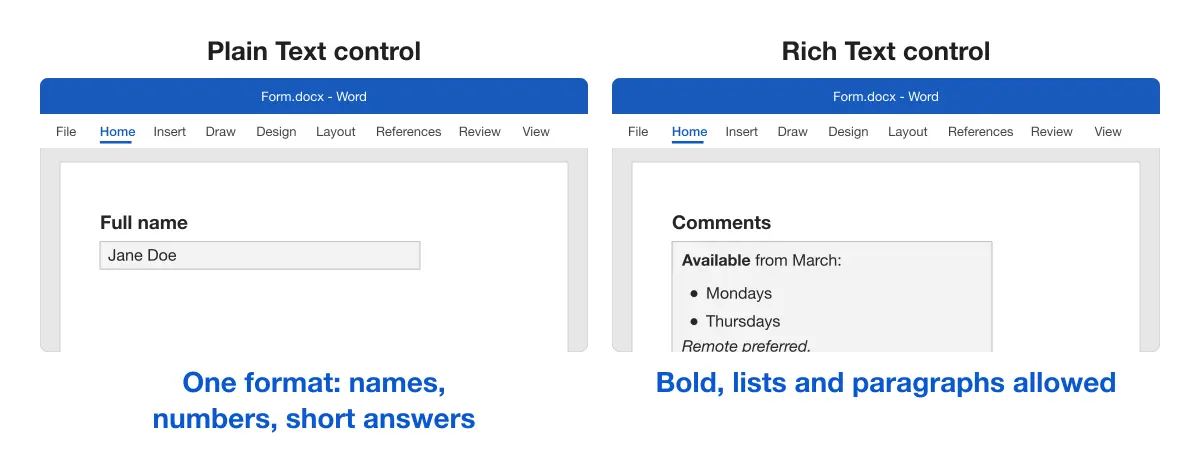
Note: To allow line breaks in a plain text field, select it, click Developer > Properties and tick Allow carriage returns (multiple paragraphs).
Adding checkboxes, drop-down lists and combo boxes
Use these for answers with fixed options.
Checkbox:
- Click where the box goes, usually just before the option’s label.
- Click Developer > Check Box Content Control.
People tick and untick it with a click. To change the tick to a ✓ or ✗ symbol, see how to insert clickable checkboxes in Word.
Drop-down list:
- Click where the list goes and choose Developer > Drop-Down List Content Control.
- With the control selected, click Developer > Properties.
- Under Drop-Down List Properties, click Add and type each choice in Display Name.
- Click OK.
Combo box: add a Combo Box Content Control and set its choices the same way. People can pick a choice or type their own.
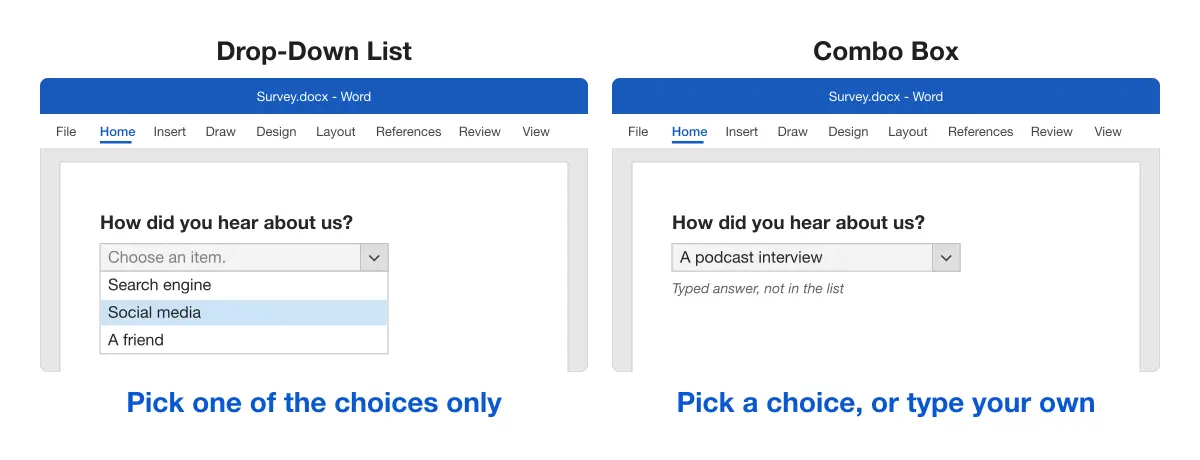
Reordering items, removing the default “Choose an item.” entry and Mac steps are covered in how to create a drop-down list in Word.
Adding a date picker or a picture field
Use these for dates and images.
Date picker:
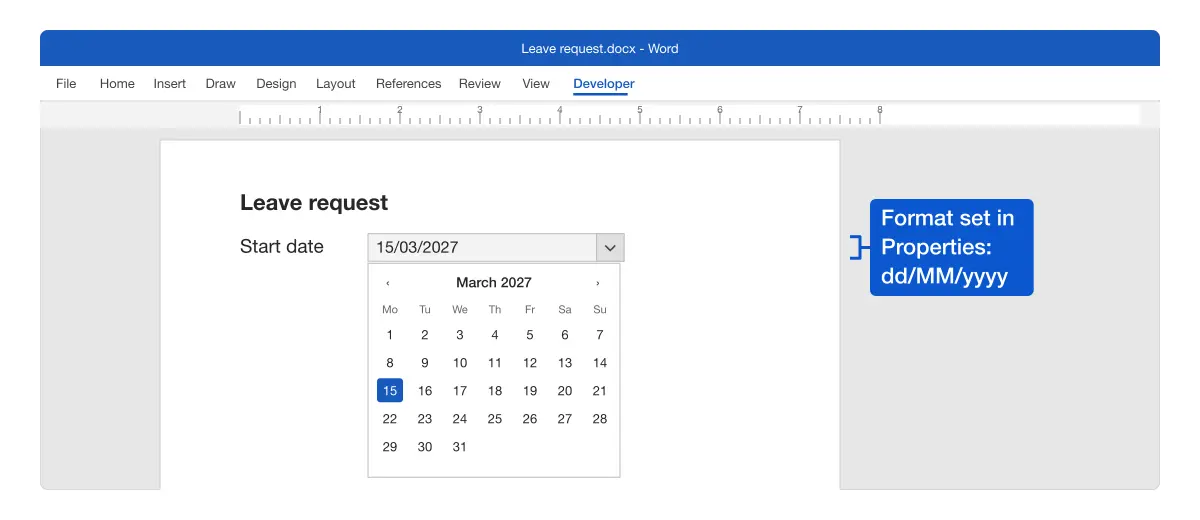
- Click where the date goes and choose Developer > Date Picker Content Control.
- Click Developer > Properties and pick a format, such as
dd/MM/yyyyorMMMM d, yyyy.
Result: People click the arrow and pick a date from a calendar, so dates come back in one format.
Picture field: choose Developer > Picture Content Control. People click the picture icon and insert a photo from their device. For signature lines, see how to insert a signature in Word.
Changing the placeholder hints
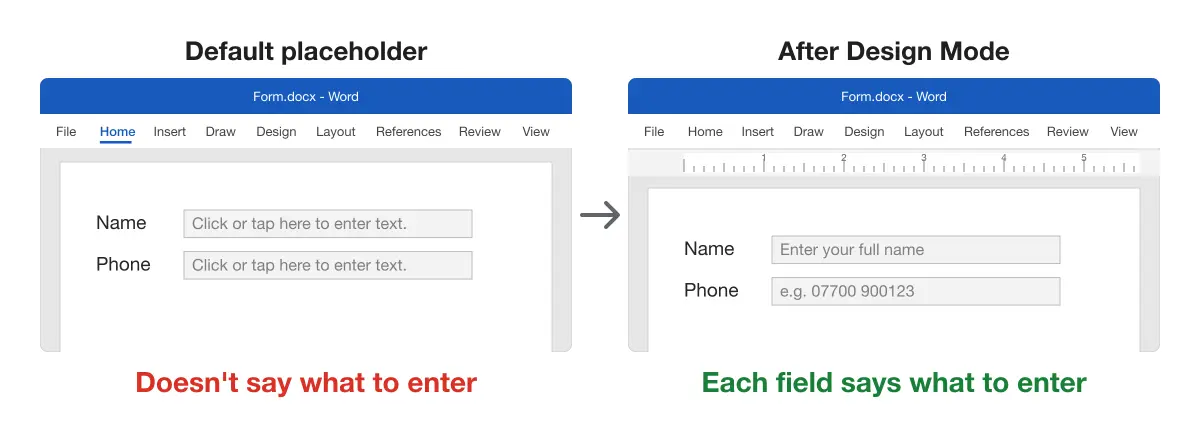
Use this to replace “Click or tap here to enter text.” with a useful hint, such as “Enter your full name”.
- Click Developer > Design Mode.
- Click inside the placeholder text and type your hint.
- Click Design Mode again to turn it off.
Result: Each field tells people what to enter. The hint disappears as soon as they type.
While a control is selected, Developer > Properties also lets you:
- add a Title, shown on the control’s tag;
- tick Content control cannot be deleted, so the field can’t be removed;
- tick Contents cannot be edited for fields you fill in yourself.
Locking the form
Use this before you share the form, so people can fill in the fields but can’t change the questions.
- Click Developer > Restrict Editing. The Restrict Editing pane opens.
- Under Editing restrictions, tick Allow only this type of editing in the document.
- Choose Filling in forms from the list.
- Click Yes, Start Enforcing Protection.
- Type a password twice, or leave it blank, and click OK.
Result: Only the fields respond to clicks. The rest of the document is read-only.
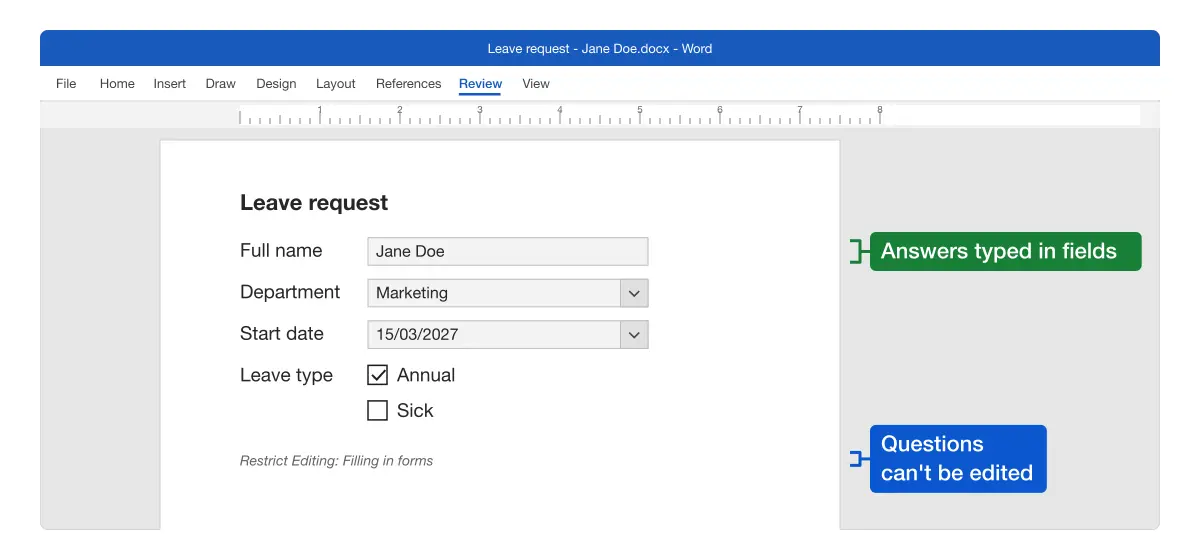
Without a password, anyone can click Stop Protection and edit the form. To change your own form later, click Stop Protection, edit it, then enforce protection again. If someone else’s form won’t let you select text, see how to unlock selection in Word.
Tip: To lock only part of the document, split it with section breaks, then use Select sections in the Restrict Editing pane.
Sharing the form without breaking it
Use this when you send the form to other people.
- Send the .docx file. Saving the form with File > Save As > PDF turns every field into plain text, so nothing can be filled in. That’s the mistake shown at the end of the video.
- Save it as a template if you reuse it: File > Save As > Word Template (.dotx). Each person who opens the template gets a fresh copy. Microsoft explains this in Save a Word document as a template.
- Printing works too. The field borders don’t print, so a printed copy looks like a normal paper form.
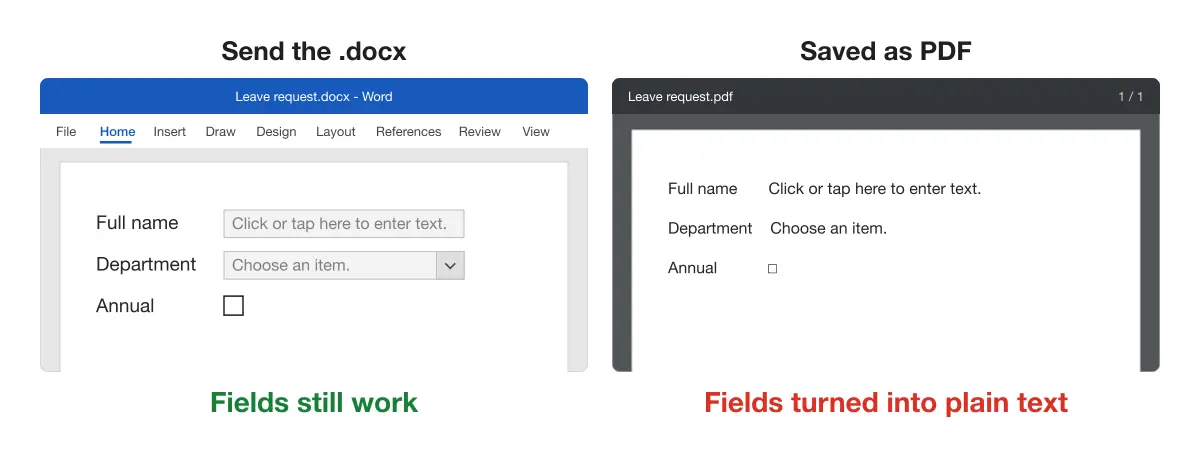
If you need a fillable PDF, create it in a PDF editor such as Adobe Acrobat instead. Merging returned forms into one file for review is covered in how to merge Word documents into one.
Comparing the methods
| Method | Best for | Works on |
|---|---|---|
| Content controls + Restrict Editing | Modern fillable forms | Word for Windows |
| Legacy form fields + Protect Form | Forms built on a Mac | Windows and Mac |
| Microsoft Forms | Online surveys with automatic results | Any browser |
| Fillable PDF | Forms that must stay PDFs | A PDF editor |
Platform differences
- Windows: everything above.
- Mac: Microsoft documents the Text Box, Check Box and Combo Box form fields on the Developer tab, with Options for each field. Lock the form with Developer > Protect Form.
- Word for the web: you can’t create a fillable form, per Microsoft’s forms guide. Build it in the desktop app first.
Troubleshooting fillable forms
- The Controls group is greyed out. The document is protected or in compatibility mode. Click Stop Protection, or turn off compatibility mode.
- People can edit the questions. Protection isn’t on. Open Restrict Editing and choose Filling in forms.
- The fields don’t work for the person filling it in. They probably received a PDF. Send the .docx file.
- The layout shifts as people type. Put labels and fields in a table so they stay aligned.
- The placeholder text won’t change. Turn on Design Mode first.
- A checkbox shows an X you don’t want. Change the checked symbol in Properties, as covered in the checkbox guide.
If a form or label needs a scannable code, see how to create a barcode in Word. For more ways to add objects to a document, see the Microsoft Word guides.